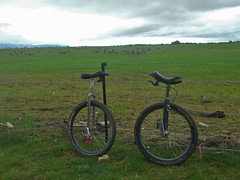
After getting back from Unicon 17, I realised that I have far more wheels than unicycle frames, and it was time to get a dedicated frame for my 700c standard racer. I had been using my 2008 Triton sponge frame, which is an amazing unicycle frame, but looks rather silly with a sleek racing wheel. It was designed for a 29’er mountainbike wheelset, and had enough clearance to drive a truck through. That notwithstanding, every time I wanted to go out for a ride, I’d be swapping wheels in the frame.
I was originally planning a titanium road frame, but with Dmitry at Triton busy with bicycles over the 3yrs I had been pestering him, I had to find a local alternative. With three titanium unicycles and a Litespeed titanium road bike, you can probably guess I am a big fan of the grey metal. The great thing about titanium is that it is strong, corrosion resistant, doesn’t need painting, and still looks great many years later. It is also hard to work with, which is why there are few ti builders around.
So with a bit of research I came across the new stainless steel tube sets being used on bicycles. Most of the bicycle tube manufacturers are making them, and they are perfect for custom bike frames. As yet, though, I am not aware of any stainless steel unicycles. Stainless steel doesn’t need painting, is light, strong, and, in my opinion, looks even better than titanium….I would be swapping grey metal for the shiny one.
I looked up several frame builders in New Zealand, but settled on Anders Waiker at C3 (crucial custom cycles) in Petone, not far from where I live. It meant I could pop by during the week to sort out any design issues. He makes some beautiful mountainbike frames, so I was keen to work with him.
We decided to use the KVA MS3 tubeset, which has a built in curve for a bicycle chainstay. We thought the s-bend would look pretty cool on a unicycle. It took a few weeks for the tubes to arrive from the US, but here they are:
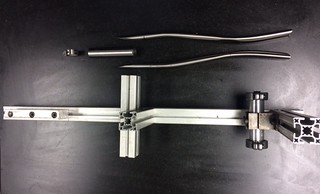
Now you’d think a unicycle frame is a fairly straight forward thing to build, but once you add in curves it becomes a bit more complicated. Luckily, I could bring in my 700c wheel to slot into the frame to help with measurements, because my framebuilder is local.
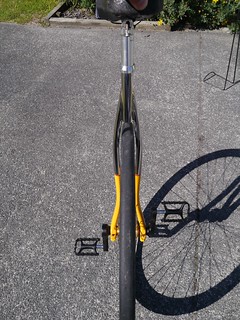
We had less clearance than expected, which meant that Anders had to crimp the legs slightly. On the other hand, the s-bend gives heaps of foot clearance, which is vital to anyone who races standard class. You want your feet as close to the frame as possible to maintain a high cadence, but you don’t want your feet hitting the frame either. An added bonus of bicycle tubing is you get the special things they do to bicycle tubes, such as double butting. These tubes are superlight!
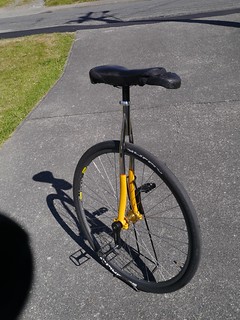
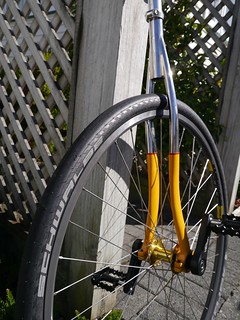
Anders fillet brazed the frame, giving it a smooth seamless appearance. Check out the seat-tube and fork leg interface:
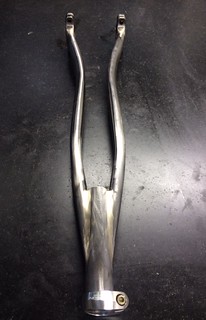
The fork was completed with a mirror finish (it took Anders 3 days to polish it!), and sent off for painting. Unfortunately the painter had undergone hand surgery, so it took a couple of months to get it back. Anders topped the frame off with a very nice Thompson seat clamp.
The complete specs are:
Nimbus Eclipse hub
Wheelsmith SS spokes
Mavic Open Pro rim
Schwalbe Kojak 700x35c folding tyre
Nimbus Venture 89mm cranks
Welgo M111 pedals
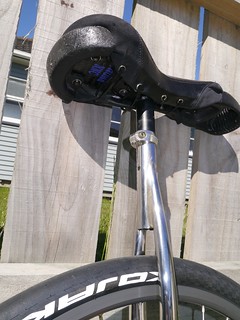
Kris Holm seat post
NNC Flatfish saddle
Total weight is 3.410kg with the above specs. I did some swapping of components (75mm nimbus cranks and 700x23c Rubino Pros), and swapping seats (my other Flatfish saddle uses lighter foam), which brought it down to 3.133kg. Not far off a sub-3kg unicycle, which should be achievable with a few component tweaks.
So how does it ride? Unlike a bike, the frame has less influence of the ride than the wheel itself. The main requirements are stiffness, particularly on climbing and cornering, adequate clearance, and lightweight.
I’m pleased to report the C3 stainless racer performs well on all three counts. I jammed it up the steepest hill I could find, which would normally flex any unicycle frame. Despite trying my hardest, there was no rub at all, even with the small clearance between the spokes and the frame. It corners like a dream, tracking exactly where I point it, even when driving hard into a turn.
The s-bend stiffens the frame and gives oodles of room to get my feet close to the midline without rub. Not a big deal for most riders, but for anyone spinning over 160rpm, the last thing you want is to hit the frame with your foot. Weight-wise, the frame is comparable to the Tritons at a shade over 600g. Although the butted stainless steel tubes are lighter than titanium, the bearing holders on the Tritons are quite unique. As a result, the C3 frame is weighted toward the bearing holders, which gives it a lower centre of gravity- not a bad thing.
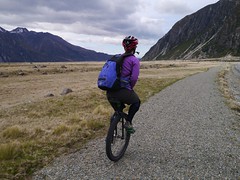
Although I built the unicycle as a racing uni, most of the time…it won’t be. That means no excuse for wearing lycra either! Baggy shorts are not a good combination with unicycle frames, they tend to snag on the fork crown. With the s-bend C-3 racer, I can ride my unicycle any time, anywhere, and not worry about ripping my shorts to bits.
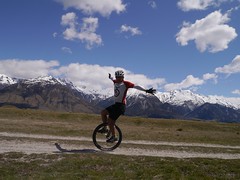
Oh yeah, did I mention it looks cool?